A very high-quality voice is achieved over public IP links using Dell SonicWALL firewalls by following the instructions in this guide.
Versature has tested the specific configuration described in this article in both lab and real-world environments. Further, other configurations have proven to either not achieve high-quality voice or cause serious issues with other non-voice traffic on the WAN.
Versature recommends the use of SonicWALL’s Global bandwidth management mode, as some firmware versions contain a bug, which causes dropped network traffic when implementing other modes.
Configuring the appliance is a 4 step process:
- Configure Global Bandwidth Management.
- Set all interface ingress and egress speeds.
- Create Address Objects and an Address Group.
- Create a firewall rule to mark traffic.
STEP 1: CONFIGURE GLOBAL BANDWIDTH MANAGEMENT
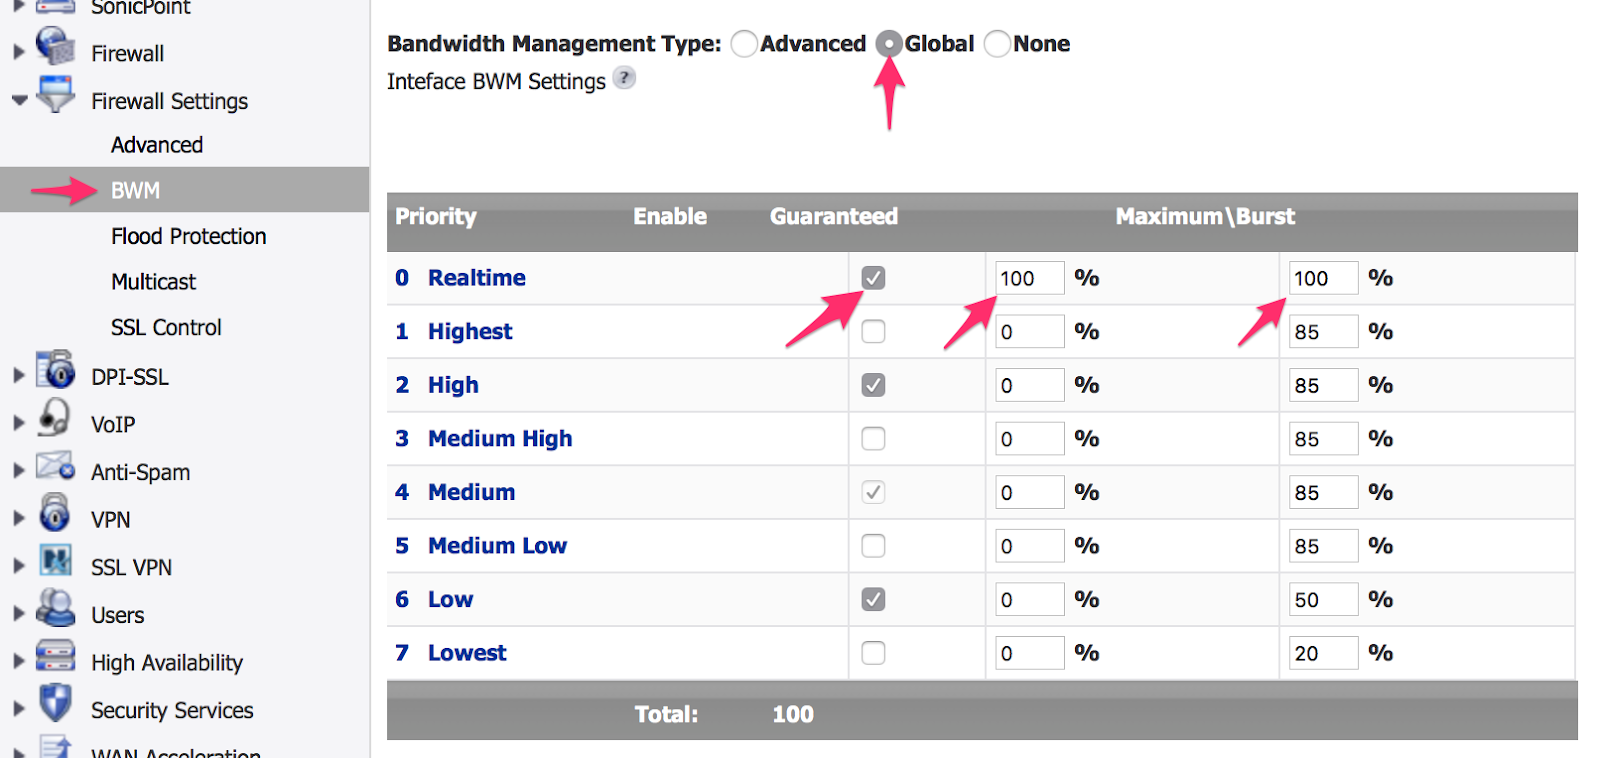
- To configure bandwidth management or BWM, under Firewall Settings, select BWM and configure:
- Set the Bandwidth Management Type to Global using the radio button.
- Enable the Realtime priority level using the checkbox.
- Configure the Realtime priority level to be Guaranteed 100% of bandwidth with a Maximum/Burst of 100%; this will ensure that voice is always permitted to use the available WAN bandwidth.
- Set the other enabled priority levels to 0% and 85%.
STEP 2: SET INTERFACE SPEEDS
- Under Network, choose Interfaces to access the Interface Settings area.
- Click on the pencil icon for your WAN link to bring up the Edit Interface window.
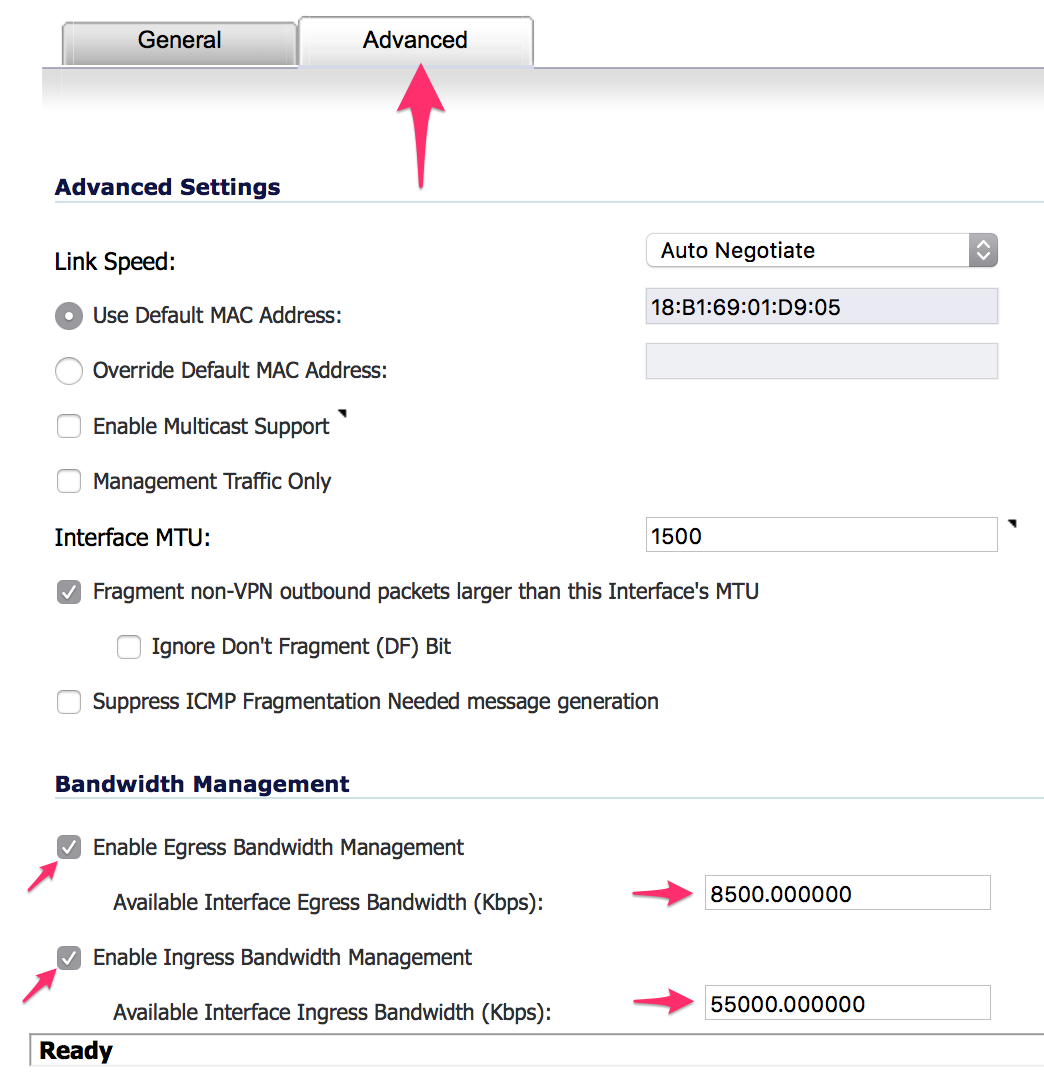
- Choose the Advanced tab and configure:
- Enable Egress and Ingress Bandwidth Management using the two checkboxes.
- Configure the Egress bandwidth (upload) and Ingress bandwidth (download), to the actual speeds provided by the link, less 500 Kbps. Use a service such as http://www.speedtest.net to verify the speed of the link, preferably by connecting a laptop directly to the link with no other devices connected to avoid inaccurate measurements.
STEP 3: CREATE ADDRESS OBJECTS AND ADDRESS GROUP
First, add address objects.
ADDRESS OBJECTS
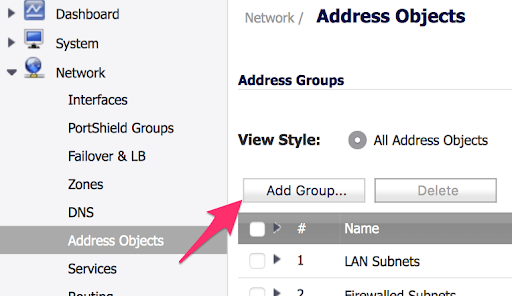
- Under Network, select Address Objects.
- Scroll down to Address Objects and click the Add… button to create a new object.

- The form that appears has four properties:
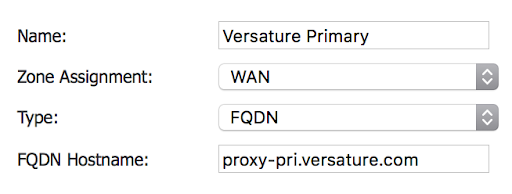
- Four Address Objects will be required, all with Zone Assignment set to WAN and Type set to FQDN. Select values for Name and FQDN Hostname from the following table:
Name |
FQDN Hostname |
Versature Primary |
proxy-pri.versature.com |
Versature Secondary |
proxy-sec.versature.com |
Versature Tertiary |
proxy-ter.versature.com |
Versature Quaternary |
proxy-qua.versature.com |
We will then add the four Address Objects created in the previous step to a new Address Group.
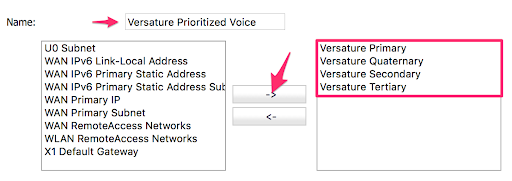
ADDRESS GROUP
- From the same Address Objects area, click the Add Group… button.
- Name the new Address Group “Versature Prioritized Voice” and add the four previously created Address Objects to it using the right arrow.
STEP 4: CREATE FIREWALL RULE TO MARK TRAFFIC
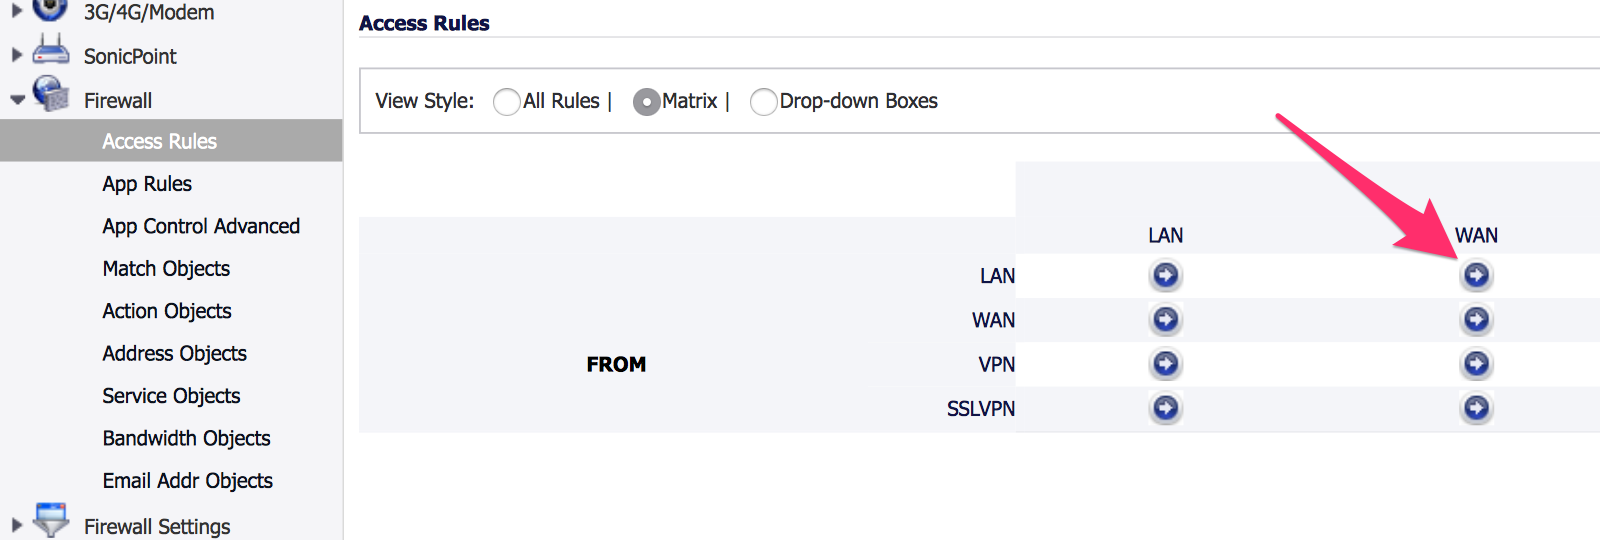
- Under Firewall, select Access Rules.
- Click on the arrow corresponding to LAN to WAN rules in the matrix.
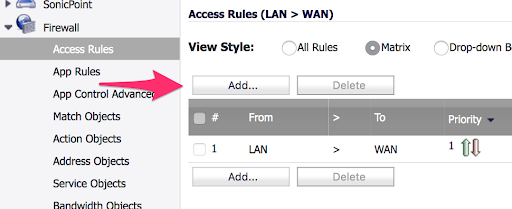
-
From the next screen, which shows all firewall rules governing traffic from the LAN to the WAN, click Add.
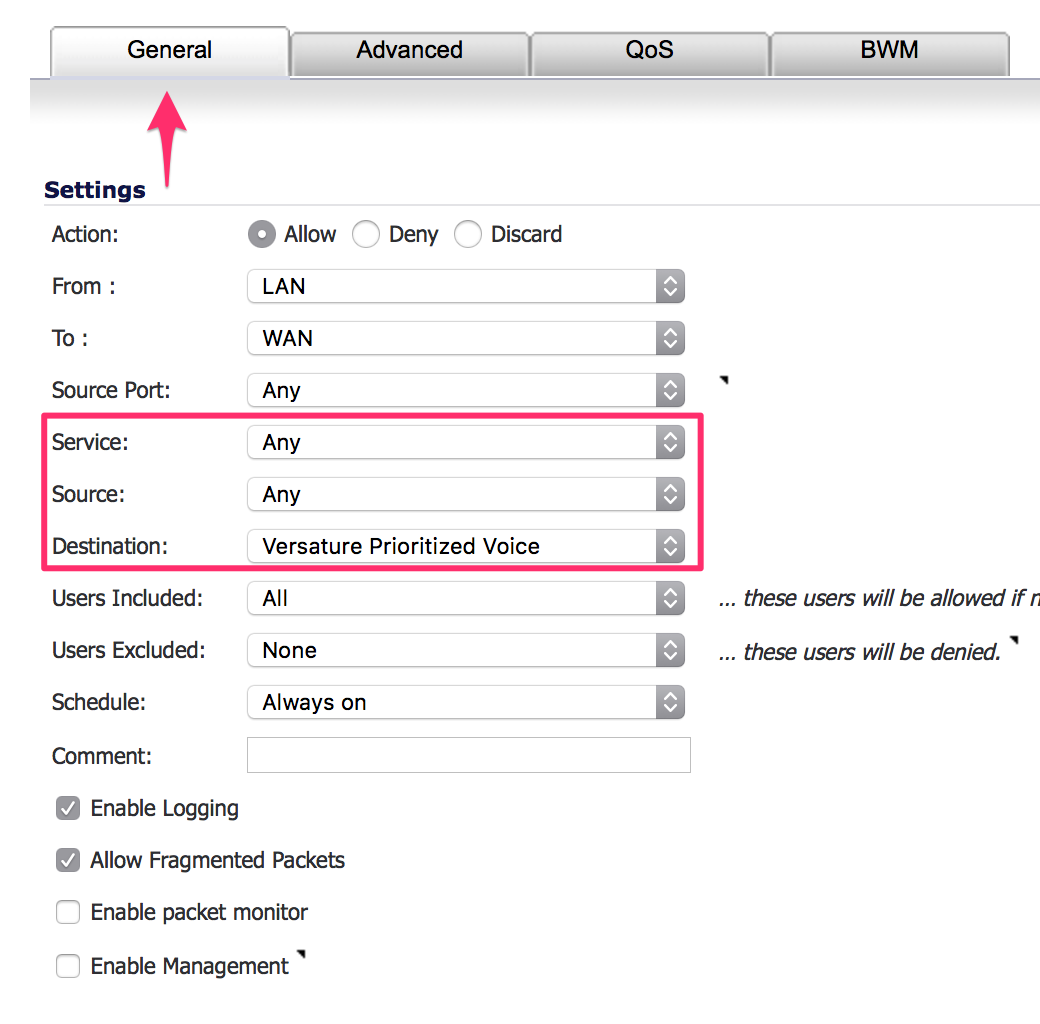
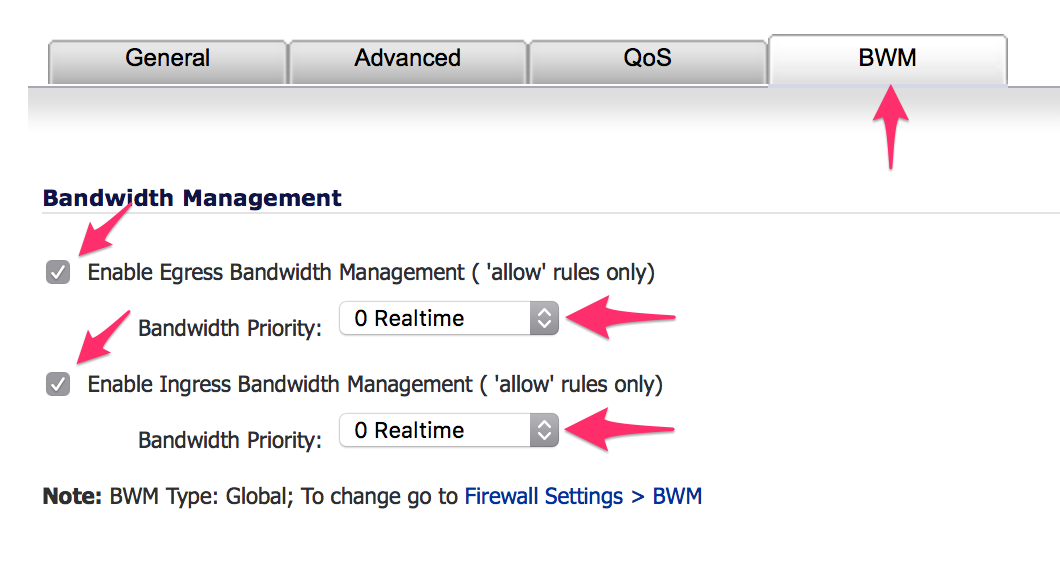
- In the firewall rule screen, starting in the General tab:
- Set Service to Any,
- Source to Any, and,
-
Destination to the previously created Address Group: Versature Prioritized Voice.
- Continuing by selecting the BWM tab, ensure both Enable Egress Bandwidth Management and Enable Ingress Bandwidth Management are enabled using the checkboxes.
- Leave both Bandwidth Priority menus set to 0 Realtime.
Verification
To verify the configuration, use the same bandwidth testing tool as was used in the first step to ensure that bandwidth is limited to approximately 85% of the values configured as interface egress and ingress.
A further test is to start two separate pings: one to Google’s public DNS server, 8.8.8.8, and second to Versature’s primary voice proxy, proxy-pri.versature.com. While these pings are active, do another speed test. You should see fluctuation and some minor packet loss on the ping to Google, while the ping to Versature’s proxy should remain relatively constant and suffer no loss.