With net2phone Canada's Hotkey Builder you can add external contacts to your desk phone's directory through SONAR. Users must add the new contact within their SONAR before office managers add them to phone directories through the Hotkey Builder.
Never change the 1st line option.
Line appearance should ALWAYS be number 1 in the builder. Do not touch this as it can disrupt the configuration of your phone.
Want to use Line Appearance? Call Support.
To correctly set up this feature, you must contact our Technical Support Team by dialing 611 from your net2phone Canada device or by calling 1-877-498-3772 and choosing option #3. Emails will be responded to within 1 business day and can be sent to support@net2phone.ca.
Star contacts to add to your Favorites Directory
The easiest way for an office manager to customize a user's phone directory:
1. The user stars contacts they want in their directory to mark them as Favourites.
2. The office manager can then create a "Favourites" directory for the user.

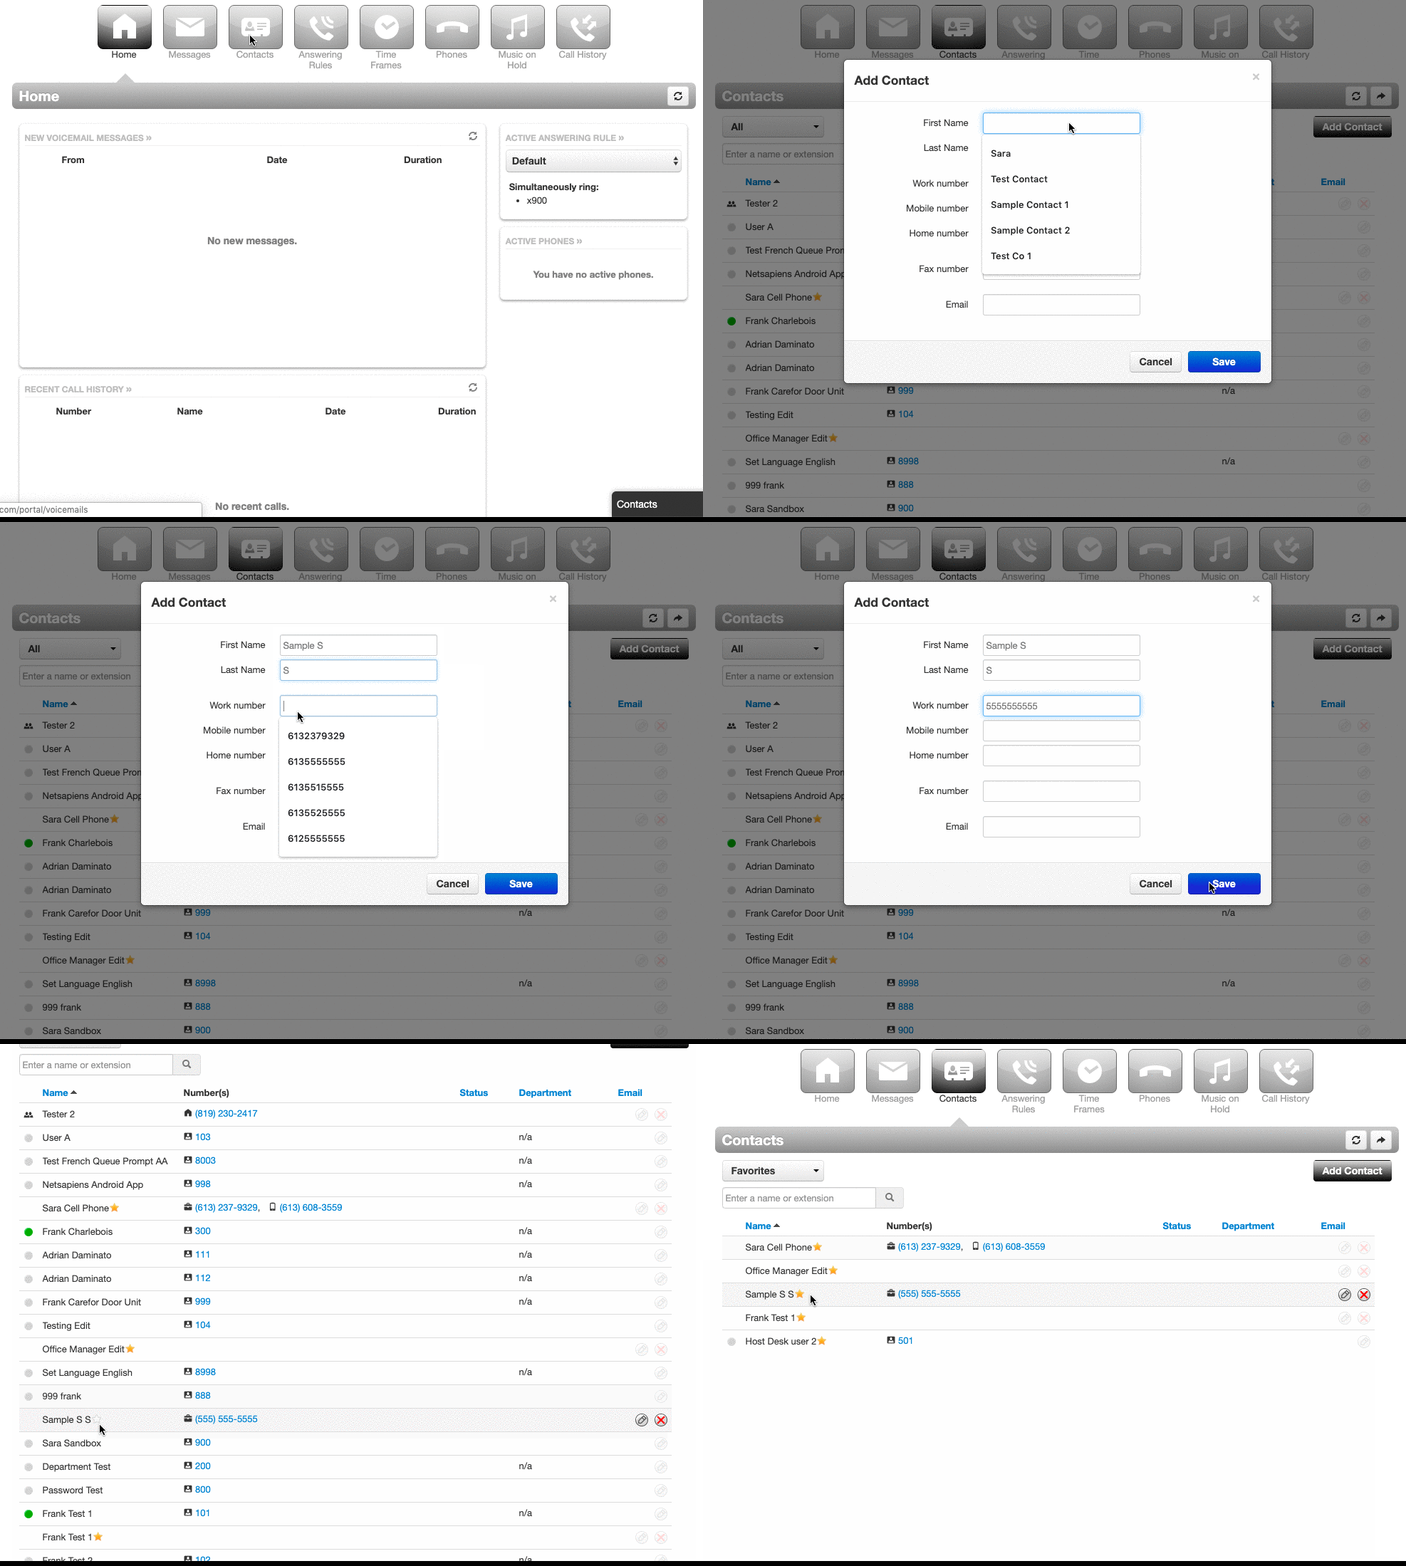
ADD YOUR CONTACT
Office managers and call center supervisors must be "My Account" view to access their contacts tab.
1. Click the Contacts tab in your SONAR portal.
2. Click the Add Contact button in the top right corner.
3. Fill in the various contact fields.
4. Click Save.
5. (Optional) Find your new contact and click the star to add it to your Favorites list.

ADD CONTACT TO HOTKEY DIRECTORY
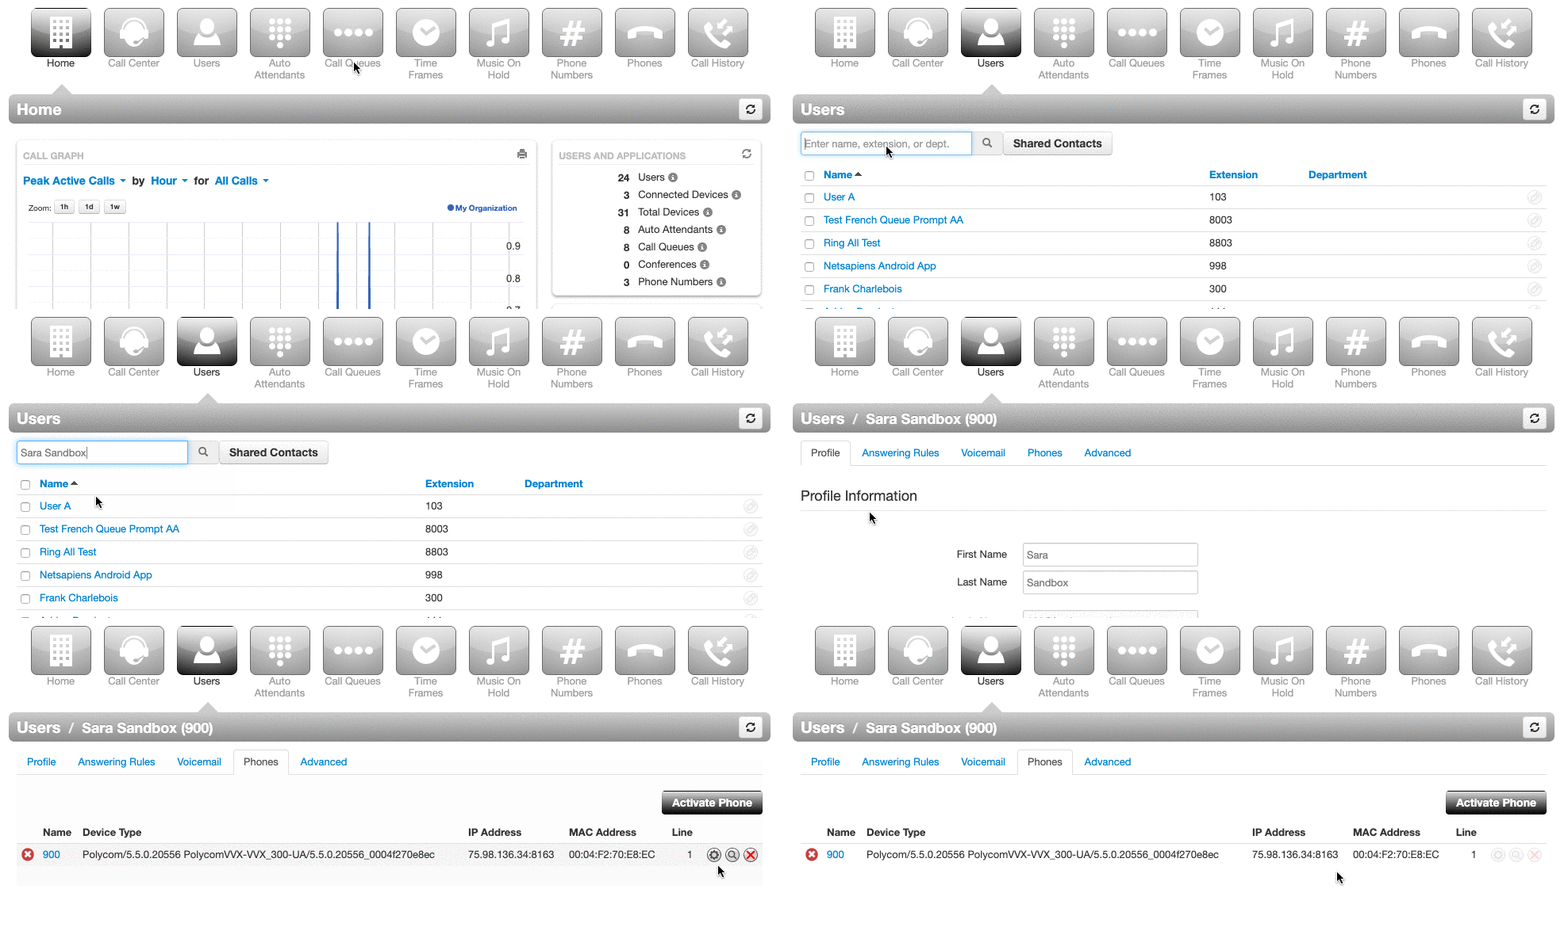
Office managers must go back to the "Manage Organization" view to access a user's Hotkey Builder.
1. Click the Users tab.
2. Search and click on the name of the user's phone you want to edit.
3. Click the Phones subtab.
4. Select the phone associated with the user's extension you want to edit.
5. Click the gear icon on the right-hand side.
6. When the "Edit button configuration for this phone" pop-up appears, click Yes.

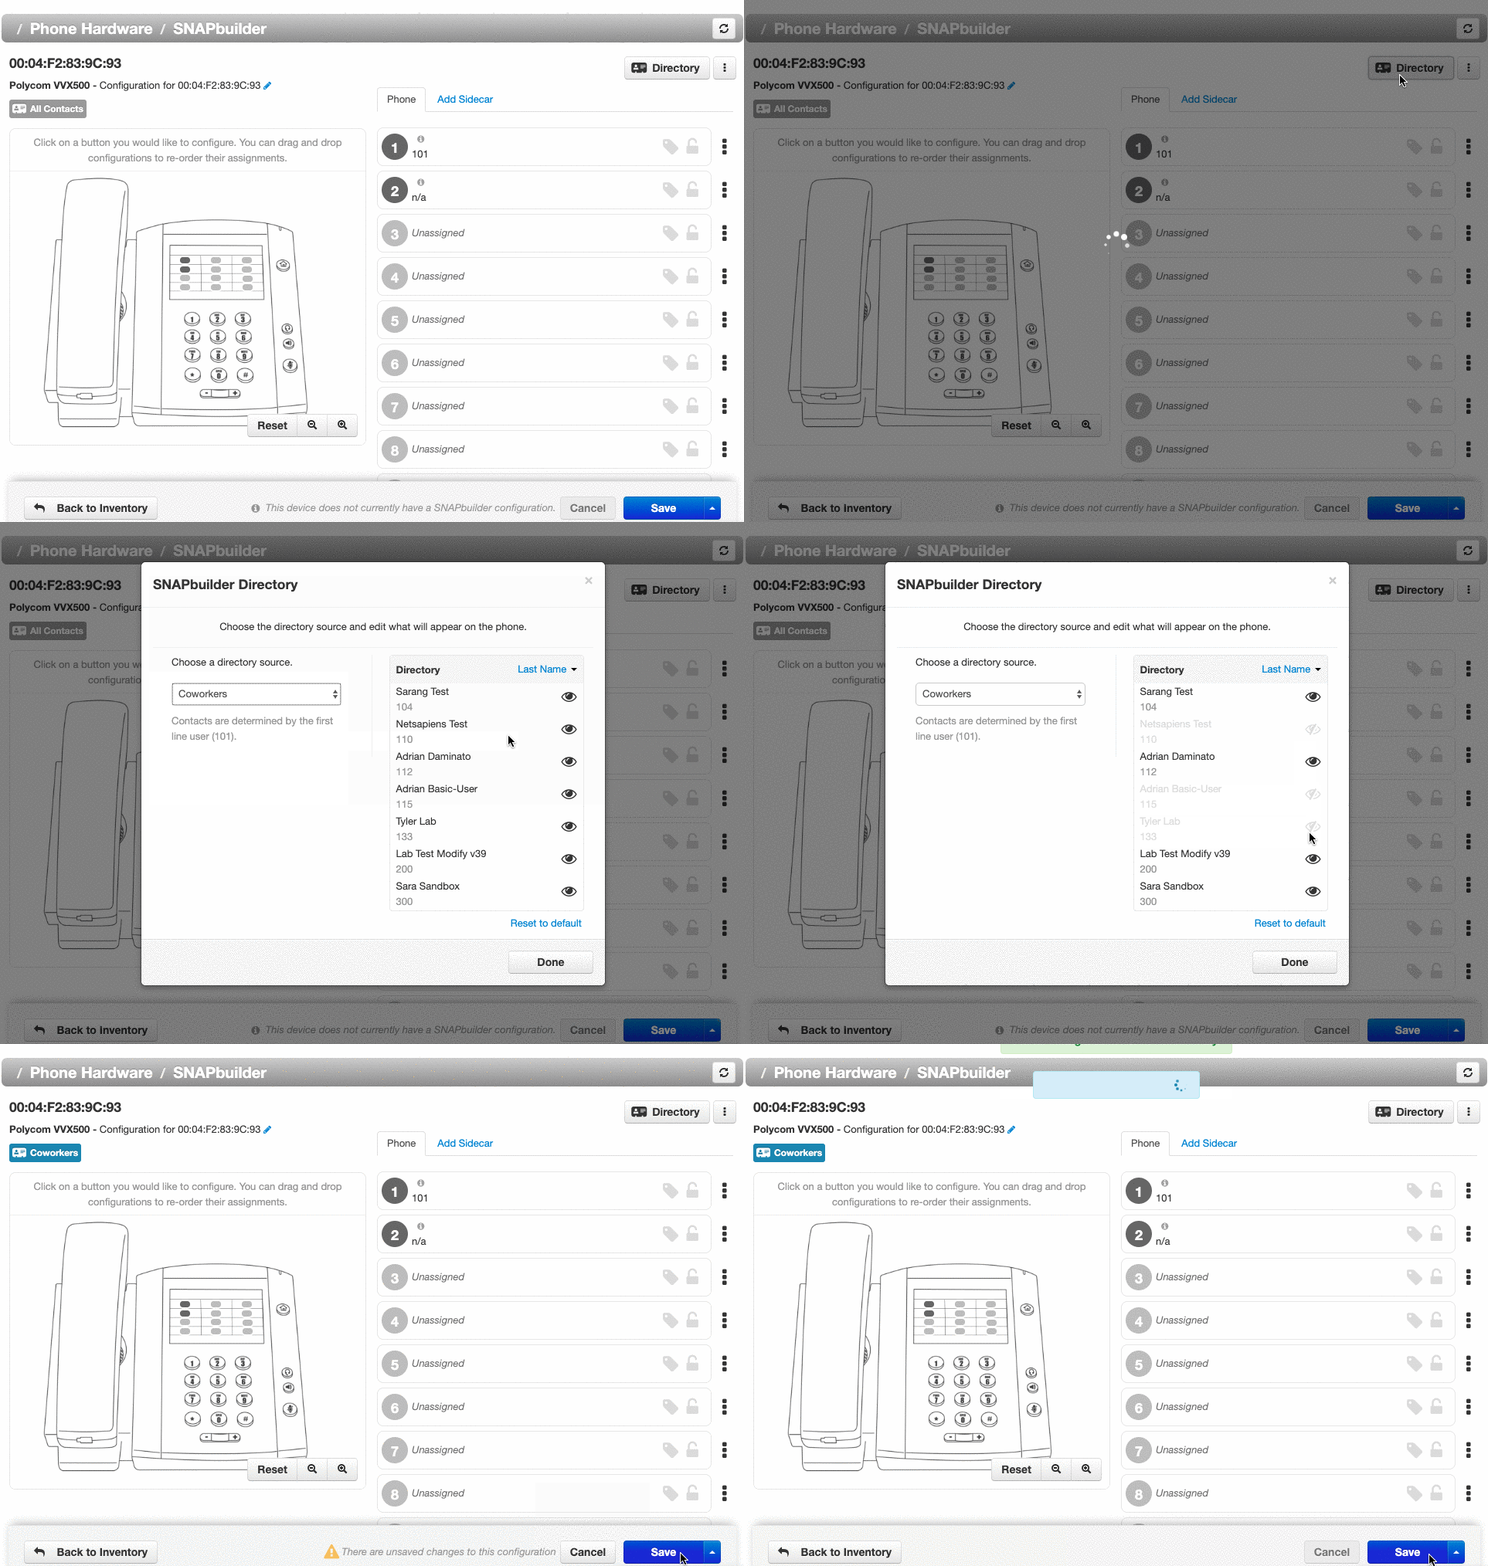
Once you have accessed the Hotkey Builder,
1. Click the Directory button on the upper right side.
2. Choose the directory source they want.
3. (Optional) Hide contacts.
4. Click Done.
5. Click Save, or to apply the changes immediately click the up arrow next to save, and choose "Save and Resync."
Changes won't be applied to a phone until it is rebooted!!
You can set a phone to reboot directly from this page by clicking the up arrow next to the Save button and choosing Save and Resync.


Success!
We can now see "Sample S" as a contact!
